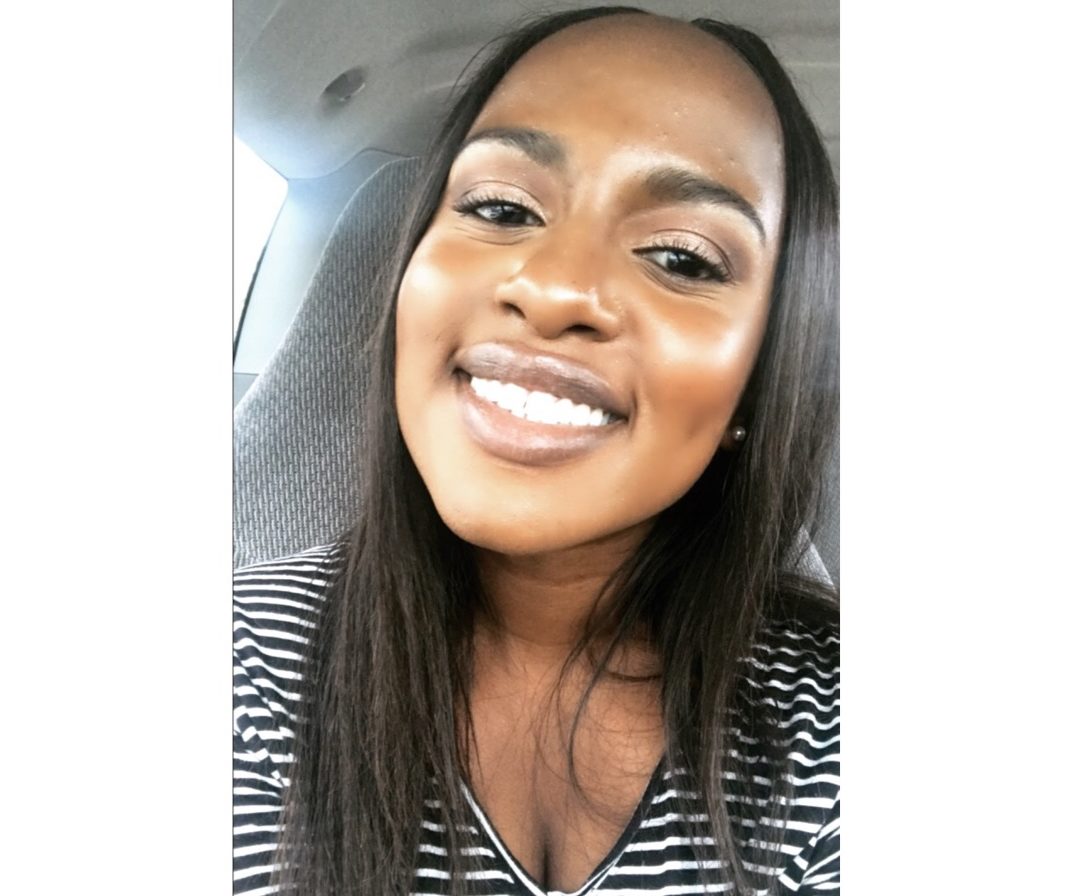
I’ve wanted to do this post for a while now and I’m so glad to be writing this! So do any of you ever struggle with what to do with your makeup when going on a first date? I usually end up struggling with my outfit because I have a simple makeup routine that I do whenever I go on a first date with a guy. Honestly, I do this makeup routine whenever I feel like it so definitely doesn’t have to be exclusive to just a first date, you feel? OKAY let’s get started!
The Eyes
First I start with doing my eyebrows (because it stresses me out the most). I have very thick eyebrows but I still need to clean them up by filling them in a little (especially when I haven’t gotten them done in a while). Here are the products I use.

Then I move on to my eyeshadow! This is one of my favorite parts because I really get to be creative here (keep an eye out for a future post on my night out makeup look also).

This primer helps my eyeshadow not to crease, sometimes I’ll also put my concealer on top for a base for the eyeshadow to stick to.


This palette has so many pretty matte shadows. I use the colors “Flower Child” and “Smarty Pants” as my transition colors to start off with.
I LOVEEEEE this palette! I use the colors “Raw Sienna” and “Burnt Orange” to deepen up my crease (on top of the transition colors). So the whole point of transition colors is to make eyeshadow colors blend seamlessly together so that you don’t have harsh color lines.

Then I go in with the color “Cyprus Umber” on the outer V of my eyes to deepen them a little bit.


In this palette I pick up the color “Trick” and put it all over my lid generously. This is my absolute go to palette for a first date look. Sometimes I’ve only used this palette alone just to create the look I wanted.
Moving on to eyelashes:
I use this mascara only at the bottom of my eyelasshes to get more volume. I have pretty long eyelashes already so this really helps to thicken them up.

Then I go in with this mascara only at the very tip of my eyelashes to make them even longer and it really does the trick. Absolutely no need for fake eyelashes at all if you follow my trick correctly 🙂
The Face
First I put on a primer (like I said in my recent shopping finds post, I do not always do this..oops). But I use the Benefit Cosmetics The POREfessional Face Primer.
Then I use my all time favorite foundation which is the Urban Decay Naked Skin Weightless Ultra Definition Liquid Makeup. I apply this with my beauty blender/ beauty sponge. You want to use a sponge so you don’t get lines from a makeup brush on your face. Most people like to put powder on top but I like the dewy look the foundation gives me and putting powder on top of that makes my face look too matte.

Next I move on to highlighting:
I put this concealer under my eyes and on the bridge of my nose. A little bit under my cheek bone on the side edges of my face (to accentuate it more when I end up contouring later). I also put it on the middle of my forehead. Again, I use my beauty blender to blend all of this concealer.
I use this powder to set all the areas that I just highlighted with my concealer. There’s really no need to bake, I just take a little bit on my powder brush and apply where I need to.
Now on to contouring!
I like to mix all three of the contour colors (to play around with how dark I want to go). I apply it on the bottom of my cheeks to accentuate them, on my forehead (to make it look smaller LOL), and on the sides of my nose close to my bridge (to make my nose look thinner). Then I blend, blend, blend with my contour beauty blender!

Now onto bronzer and highlighter:


I usually like the look of my contour after I’m done and I don’t need to go in with a powder contour to set it, however if I did, the contour powder on this kit is what I would use. Then I use the bronzer on this kit to add some color onto my cheeks.


Then I put this highlighter powder on the high points of my cheek bones, bridge of my nose, a little on my forehead and chin.
Lips
To finish off the look I use my favorite lip gloss which is the Anastasia Beverly Hills Lip Gloss in the color Kristen.

Setting The Look
Then I finish off with a natural setting spray to put some hydration on my face. One of my favorites is the one I mentioned in My Current Favorites post (cough , cough go read it if you haven’t) which is the Mario Badescu rose water facial spray. The link is in that post.
The Final Look

What are some of your go to makeup looks? Let me know in the comments below and as always subscribe to my blog to get exclusive updates!
